Sunday, 27 May 2012

Apricot and Cardamom Challah Daring Bakers May 2012


Challah (also ḥallah plural: challot/ḥalloth/khallos) (Hebrew: חלה) is a special braided bread eaten on Sabbath and holidays.
It is also named khale (eastern Yiddish, German and western Yiddish), berches (Swabian), barkis (Gothenburg), bergis (Stockholm), birkata in Judeo-Amharic, chałka (Polish), colaci (Romanian), and kitke (South Africa).

According to Jewish tradition, the three Sabbath meals (Friday night, Saturday lunch, and Saturday late afternoon) and two holiday meals (one at night and lunch the following day) each begin with two complete loaves of bread. This "double loaf" (in Hebrew: lechem mishneh) commemorates the manna that fell from the heavens when the Israelites wandered in the desert for forty years after the Exodus from Egypt. The manna did not fall on Sabbath or holidays; instead, a double portion would fall the day before the holiday or sabbath.

Each single loaf is woven with six strands, both loaves have twelve which represent each tribe of Israel
Thankyou Wiki for the info:
I have Challah before from Artisian bread in 5 minutes here then I have made this Double braided bread  also this beautiful celebration bread so I am not that new to braiding especially when you have a daughter who have very long hair so till she was 15 I used to braid her hair :-)

I used Easy Challah recipe but add cardamom, dried apricot and extra sugar.
This months Dairing bakers was hosted by Ruth from The Crafts Mommyhood   Using recipes from all over, and tips from “A Taste of Challah,” by Tamar Ansh, she encouraged us to bake beautifully braided breads.


Easy Challah

(from templedavid.org)
Ingredients
4 cups (960 ml) (360 gm/20 oz) all-purpose (plain) flour
1 cup (240 ml) warm water
1 package (2¼ teaspoons) (11¼ ml) (7 gm) (¼ oz) package rapid rise yeast
4 cardamom pods, skin removed and powderd
150 gm chopped dried apricot
½ (120 ml) (115 gm/4 oz) cup sugar (added more sugar)
2 large eggs
1 tsp. (5 ml) (6 gm) salt
1 egg beaten with 1 tsp. water
Directions:
1. Measure flour, sugar and salt into a large mixing bowl.
2. In a separate bowl (or in the bowl of your stand mixer) combine water and yeast, allow to sit 5 minutes until foamy.
3. Add 1 ½ cups of the flour mixture to the water and yeast mixture, beat until well combined. Cover with a dish towel, let stand 30 min.
4. Add two eggs to the dough, beat again.
5. By hand or with your dough hook knead in the remaining flour mixture together with the cardamom powder.. Knead approximately 10 minutes. When you get to 8 minutes add the diced apricots.

6. Transfer to oiled bowl, cover, let rise one hour.
7. Punch down dough, knead approximately 3 minutes.
8. Divide dough in two. Shape each half as desired (3, 4, or 6 strand braid).
9. Place loaves on parchment covered or greased cookie sheets, cover with a towel, allow to rise one hour.
10. Preheat oven to 400 degrees.
11. Brush loaves with egg wash.
12. Bake at 400 degrees for 10 minutes. Reduce oven temperature to 375 degrees, bake until golden crust forms (about 25-30 minutes).
13. Transfer to a wire rack to cool.
Storage & Freezing Instructions/Tips:
Once cooled, challah loaves which will not be eaten right away (or in the next couple of days) should be bagged in heavy duty freezer bags. Remove excess air from the bag before securing it tightly (tying a knot or using tape). Put the bagged loaf/loaves into the freezer as soon as possible to ensure fresh taste; frozen challah will keep approximately three months.

Making strands: There are two basic methods for forming the strands used to braid challah. The first, and easiest, is to simply roll snakes between your hands like when working with clay or play dough. The second method is to use a rolling pin to roll out a flat disc of dough, then using your hands to roll the disc into a snake, rolling the snake on the counter with your fingers to achieve the length you need. This second method does result in a better rise, but either way works well. Whichever method you use, form your strands such that they are thinner at the ends and fuller in the middle. This will help your challah rise in the center.

Tuesday, 22 May 2012

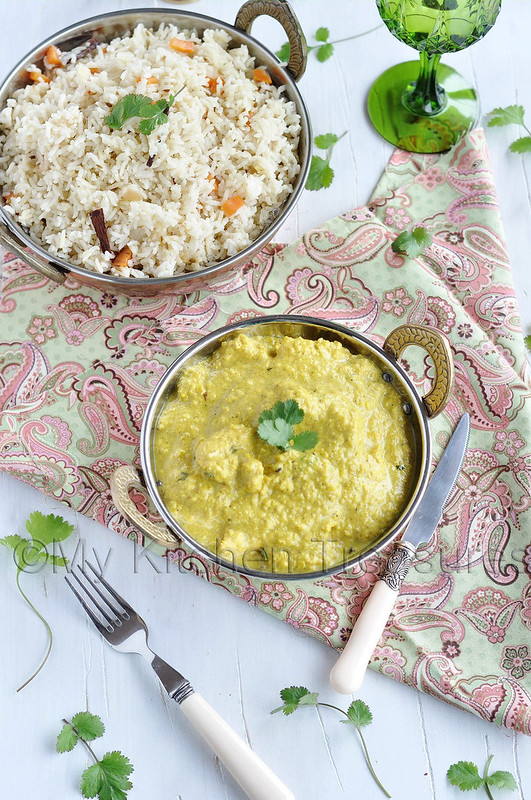
Moghul Chicken Korma


Mughlai cuisine is a style of cooking developed in the Indian subcontinent by the imperial kitchens of the Mughal Empire. It represents the cooking styles used in North India(especially Uttar Pradesh and Delhi) and Pakistan as well as in parts of Dhaka in Bangladeh and the Indian city of Hyderabad.

The cuisine is strongly influenced by the Muslim Persian and Turki cuisines of West and Central Asia, and has in turn strongly influenced the regional cuisines of Kashmir and the Punjab region.

The tastes of Mughlai cuisine vary from extremely mild to spicy, and is often associated with a distinctive aroma and the taste of ground and whole spices. A Mughlai course is an elaborate bufft of main course dishes with a variety of accompaniments.

Dishes
The names of the dishes are quite often Persian, the official language of the Mughal court. Dishes include various kebabs, kofta (meatballs), nihari, pulao (a.k.a. pilaf in Central Asia), and biryani.

This recipe is from one of my favourite Brittish TV chefs, Rick Stein. And from his book Far Eastern Odyssey. I love this book, the recipes seems to be really authentic,
I have made few dishes from this book and one of them is Nasi Goreng which is really yummy and something I do make often and then there is this Thai Yellow Curry with Shrimps. I can go on with the list but these are the two dishes I have posted in my blog.

This is a very mild curry and if you are not used to spicy food this is really perfect.
When i saw 2 table spoon rose water I was reluctant to add so much but I am glad I did it, as the rose water taste was really mild. Could be also my brand of rose water I used TRS brand.
You can serve with Naan, roties or rice like I have done it.
It is a easy chicken to make, just take a little time to grind the spices etc...
I did add extra things int he dish that i have written below too.


Serve 6.
2 tbsp white poppy seeds
2 tbsp Rosewater
1/2 tsp looslet packed saffron strands ( I used powder)
40 gm peeled ginger grated
25 gm garlic grated
2.5 cm cinamon sticks
Seeds from 10 green cardamom pods ( I only used 5 but my Hans think if the recipe asked for 10 i should have added that)
2 tsp corriander seeds.
1/2 tsp freshly grated nutmeg
(1/2 tsp turmeric powder)
250 gm natural wholemilk youghurt
700 gm skinless and boneless chicken , cut into 5 cm pieces
350 gm onion roughly chopped
50 gm ghee ( I used oil)
50 gm ground almonds
1/2 tsp freshly dround peper
3 green chillie halved lengthways
75 - 100 ml double cream.
Salt to taste.
Also added few sprigs of corriander leaves when the dish was done.

Heat a dry , heavy based frying pan over a medium heat, add the poppy seeds and shake them aorund for a few seconds, until they darken very slightly and smell nutty.
Tip into a spice grinder, leave it to cool, then grind into a fine powder.
Put  into a bowl and set aside.
Warm the rose water, add the saffron and set asdie to soak.
In the same pan over a medium heat add the cinamon, cardamom pods and corriander seeds, lightly roast them, and grind them into a powder.

Put that garlic,ginger,ground roasted spices, nutmeg, youghurt and 1 tsp of salt into a bowl and mix together. Put the chicken pieces and leave it to marinate for 30 minutes.

Meanwhile put the onions into a food processor and blend into a smooth paste.
Heat the ghee/oil in a wok or heavy based pan, add the onion paste and fry gently for 5 - 6 minutes until it just starts to brown.
Add turmeric.
Add the chicken and all the marinade and 5 tablespoon of water.
Bring up to a gentle simmer, partly cover and simmer gently for 25 minutes.
Uncover the chicken, add the green chillies, ground poppy seeds and saffron rosewater and simmer uncovered for futher 5 minutes,by the time sauce should be quiet thick.
Add the cream and simmer for a futher 1 _ 2 minutes,  Sprinkle with coriander leaves ,then serve.

Tuesday, 15 May 2012

Mango Cocktail

When ever I go to facebook I see my Indian friends mentioning that they went to the market and bought juicy ripe mangoes and here I am with no Indian shop aroung so don't have the opourtunity to get hold of the fresh juicy mangoes.
So I just drool in the pics they post of juicy mangoes.
Few days back I went to the supermarket and I found they had this Mango fruit syrup from Monin and I coudn't resist buying them as we do make a lot of time coktails on weekends or when we have guest.

On the bottle itself they had this recipe for Vodka cocktail and Vodka is one of our favourite drink as till now that never give me headache :-)

If you don't have this syrup I am sure you can make this cocktail with fresh mango pulp which i am sure would be much more tastier.

For a 120 ml glass.
30 mlLe fruit de Monin Mango
40 ml Vodka / Gin / Rum ( I used Vodka)
10 ml lemon juice ( Used lime)
Few cubes of ice
Put everything in a shaker , shake and then strain and serve.

Wednesday, 9 May 2012

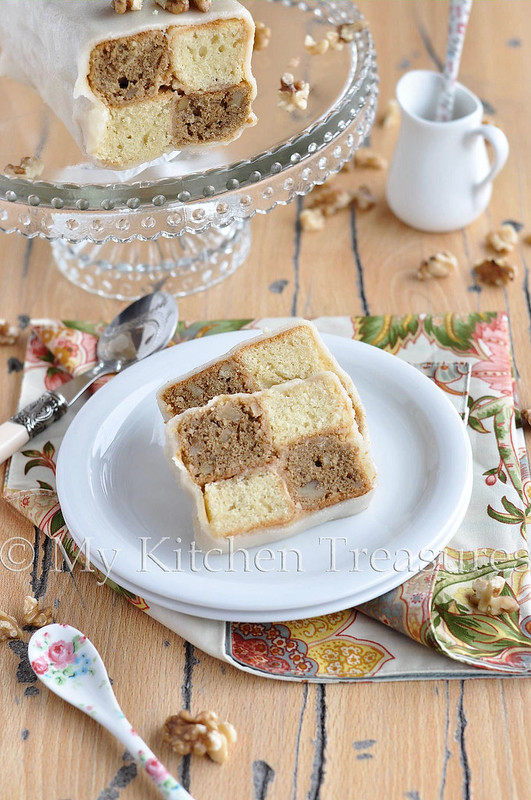
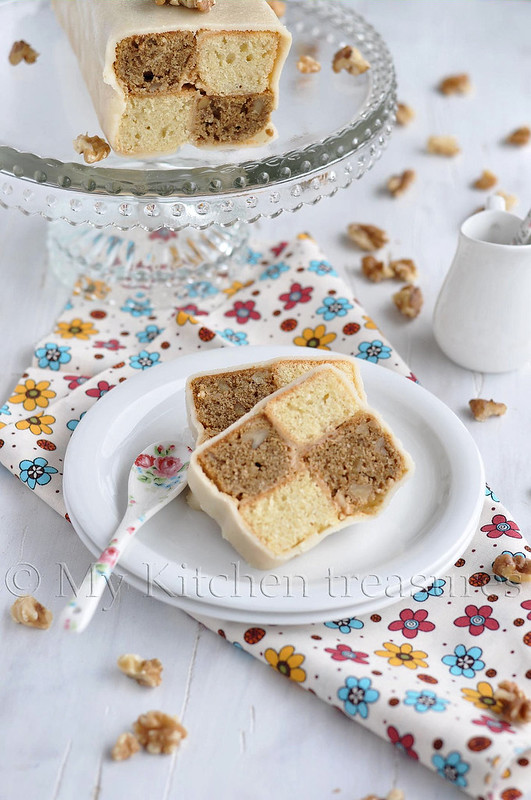
Coffee and Walnut Battenberg Cake

Can you imagine it is the month of May and it is still Cold, Dark, Rainy Dull weather here.
All to all it is really depressing weather.
Every morning when I get up and listen to the weather news I am like oh Noooooooooo again the same dull weather. If there is a mirror in front of me I would even feel pity for myself seeing my depressed face because of hearing the weather news every morning.

I know if you are living in a warm country you woudn't understan what I am talking about as you will be saying huh why she is moaning about the weather.

My nieces who were with us for a month in April coudn't understand when we moaned about the weather in Belgium but now if you ask, both of them will say in Chorous oh yeahhhhh the moaning about weather ,well now we know what they are talking about, as when the kids were here they also had horrible weather.

Ok Now enough aobut all the moaning.
If you are a regular reader of my blog you will know I have made Battenberg Cake before and thag one was with Vanilla flavour, if you want to know more information aobut this History of this Cake and to see the special cake pan hope over to my earlier post.
Now this Battenberg cake is from British Chef Mary Berry.
I just lover her Baking, what ever I have made from her always come out perfect.

Few months back I saw how Cham made easy easy Wood Backdrops and from the time I have been wanting to make one but didn't had time, but then last weekend I was home alone after long so I did one, i didn't get the same effect as I wanted as my wood had a coating on top, but I think it is Ok, till I make another one with the correct wood


And if you are in Europe you would be familiar with the TV Show The Great British Bake Off which I am. And this is one of the recipe from Mary Berry which the contestants had to make.
Ofcourse they had a mich more difficult task than me as they didn't had a Battenberg pan like me, so they had to make their own.
If you want to try the recipe you can try it from BBC website here.


Friday, 4 May 2012

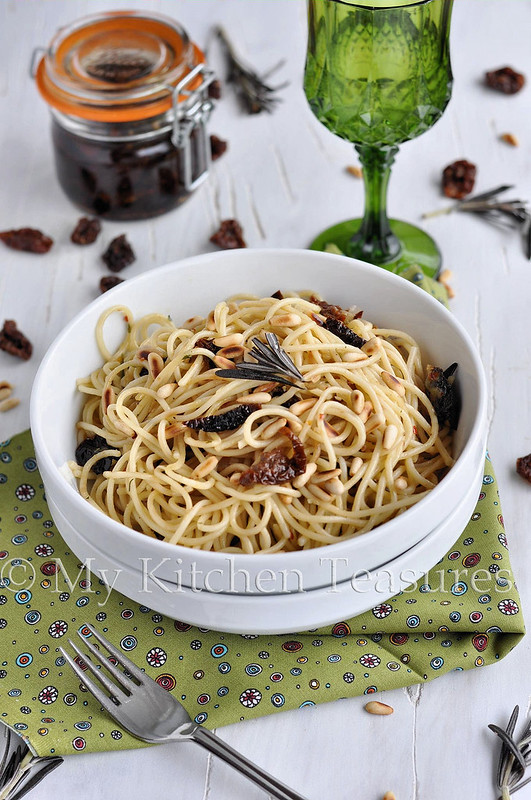
Pasta With Sundried Tomatoes, Rosemary and Pinenuts

First time when we went to Italy, we travelled around , well not all over Italy but we did went to couple of places as we where there for 15 days.
And when we were in Rome we went to this shop filled with lots of goodies and there we bought few packs of sundried tomatoes ,and when we came back home I added some into olive oil and from that time onewards I always have a bottle in my kitchen shelf.
And then we went back to Rome as a specail treat for Shyama as she got 18 and we went back to the same shop and bought a whole load of sundried tomatoes.
I do have to admit they are almost finished ( well still have two packs left).

So the first trip we went, Hans took us the second evening to a restaurant as he had been to this place during one of his concert trips and according to him the food was super yumm.
I do have to agree to him, the food there was so good that we went back to the same place couple of evening and then when we made the trip to Rome again we went to the same place again for few times, so the last evening we went to this place again and the owner of the shop offered us free drinks as she said you all have been comming here so many times.
But then Hans would disagree he would say she only gave the free dirnks becaus he was so charming to her :-) and to that I replied to him you cann be charming as much as you want as long as I get free drinks :-)

Ok so this Rosemary-Sundried pasta I ate there and I fell in love with it and I remember ordering it again while we went there.
When we got back home I wanted to recreate the dish here at home and that is exactly what I did.
So the recip is not from a book or magazine , I just created it according to how it tasted when I ate it.
Oh and it is really good as I have been laking this pasta for the last 3 year

Another reason to have this post is because Aparna of My Diverse Kitchen, which I am certain most of you will know her through her wonderful and beautiful blog, is starting with photography Excersie.
Which I think is a wonderful idea, and every month she will be giving new excercise.
So if you are intrested in improving your photographic skills which I am sure you all are, then do participate.
You will find the information here


I do have to say I took the pictures before I read the whole post in detail, so I didn't use a tripod. So you can see the two pictures are not taken in the exact position that will teach me to read the whole detail than hurrying up with the project.
The left side pic f / 4.5  ,  Shutterspeed 1/125s and ISO is 200
The right side pic f / 2 , Shutterspeed 1/ 500s and ISO is 200

I always take my pictures near to a huge window, especially as it is still dark and dull weather here so I get enough light , also use a white board on left side to reflect the light.

Now to the recipe.
For 3 person:
300 gm dry pasta
4 to 5 tbsp sundried tomatoes slices ( don't slice them thin, slice them in chunks)
Couple of sprigs of Rosamary ( you might think it is too much while you make the sauce it won't be, it is to flavour the sauce and while eating the dish you pick out most of it)
2 to 3  large onion chopped
6 to 8 tbsp olive oil
4 garlic cloves finley chopped
1 tsp chilie flakes or according to your taste ( i usually add more)
Couble of  tbsp fresh parsley chopped
2 to 3 tbsp toasted pine nuts
Pepper and salt to taste
1/4 cup grated paremesaan cheese.More if you love cheese like in my family so i would opt for more :-)

Heat the oil in a pan, add the onions fry for few minutes add the chillie flakes and garlic and fry for a minute or two.
Add the rosemary and parsley,  sundried tomatoes salt and pepper. Fry for few  minute.

In the mean time cook the pasta according to the packet and drain , I always keep a cup of pasta water aside.
Add the pasta, few tablspoon of cheese and the pinenuts to the pan and mix everything together. If the mix is too dry add a couple of tbsp of pasta water to loosen it up.
Serve  sprinkling with the parmesan cheese.
I also usually add a tbsp of olive oil on each plate before serving too.

Tuesday, 1 May 2012

Belgium Waffles

I know it is a while I posted something here as some of you know , my two nieces were here with us for a month holiday from India.
So I have been busy with them and taking them to places. In this one month we went to see places in Holland, France, Germany and ofcourse in Belgium.
So it has been very busy.
I did indulge them in my cooking and baking, just didn't had time to take pictures of the dishes, In the time they were here I could only take pics of these Waffles and then of the Macarons I made for them.
For the rest it was all gobbled up fast :-) or no time to take a picture.
I have posted Waffle when I started my blog, but then as I made these for my nieces I thought I will take new pictures and blog them again.
You want to see step by step pictures you can see in my old post, I have been using this recipe now for years and it always come out perfect.

A waffle is a batter or dough-based cake cooked in a waffle iron patterned to give a distinctive and characteristic shape. There are many variations based on the type and shape of the iron and the recipe used.
The modern waffle has its origins in the wafers—very light thin crisp cakes baked between wafer irons—of the Middle Ages in the Province of Brabant (modern-day Belgium)

Wafer irons consisted of two metal plates connected by a hinge, with each plate connected to an arm with a wooden handle. The iron was placed over a fire and flipped to cook both sides of the wafer. The irons were used to produce a variety of different flat, unleavened cakes, usually from a mixture of barley and oats, instead of the white flour used today.

 Brussels waffles, is generally, but not always, lighter, thicker, and crispier and has larger pockets compared to other waffle varieties.
They are easy to differentiate from Liège Waffles by their rectangular sides.
In Belgium, most waffles are served warm by street vendors and dusted with confectioner's sugar though in tourist areas they might be topped with whipped cream, soft fruit or chocolate spread (a practice considered 'unauthentic' by some local conoisseurs

Despite their name, 'Brussels waffles' were actually invented in Ghent in 1839. They were introduced to America by restaurateur Maurice Vermersch, who sold his Brussels waffles under the name "Bel-Gem Waffles" at New York's 1964 World's Fair.


100 gm Butter melted
1 litre Buttermilk
500 gm flour
3 eggs
3 tbsp oil
2 tbsp sugar
Half tbsp of soda bi carbonate.

For serving: Powder sugar
Butter

Method:
Mix everything together and make the waffers. I use my hand mixer to mix everything so that there is no lumb in the batter.
Heat the waffle machine ( it has to be really hot) pour few table spoon of the batter and close the lid, cook it for few minutes and take them out.
Spread butter and sprinkle wih sugar and enjoy.
I do admit when I make waffle at home, I will be in the kitchen making them and serving them to my family straight from the waffle iron.
It is something you have to eat it warm, so serve to your family/guest directly.