Wednesday, 31 October 2012

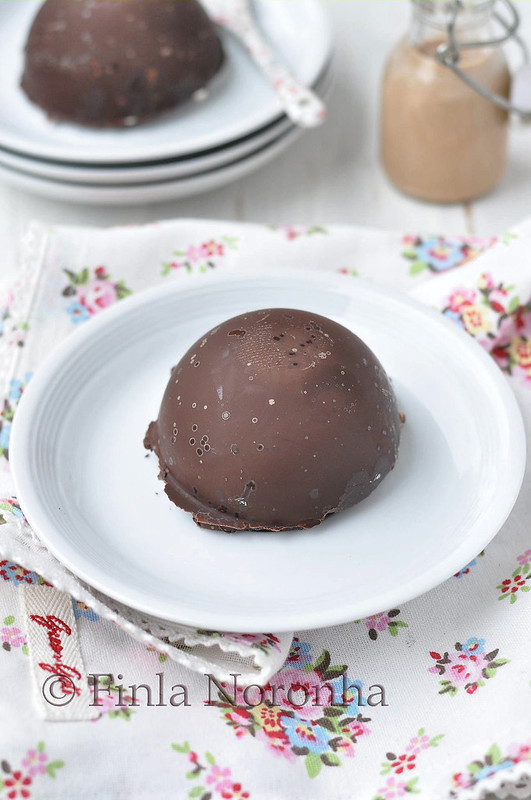
Chocolate Marshmallow Teacakes

I love the BBC Show called Great British Bake Off  , I think this is the their 3rd series, and I have been watching it every year and I love the show.
As I love the show and I don't want to miss it I will be watching when they show every week in the evening so in the end Hans will be watching with me too and, both of us will be telling to each other who was the best baker, and which bake was the most good looking etc.....and each week the contestant have to bake something which is choosen by Marry berrry or Paul Hollywood and the contestant don't know and one week it was this Chocolate Marshmallow Teacakes, the moment I saw that I was like I must make them as I have been wanting to make them for a while.


All in all we loved it, but none of us like the biscuit as it was made with whole wheat, I thought it was not that biscuite , so I think next time I will make them with white flour to have a more crumblie texture.
Another minus point is you can't keep them for more than 2 days, well atleast I coudn't keep it as they started getting a bit runny could be the egg whites.
But then I think normally as they are so yummy nothing will be left over in the same day.
I had left overs because how much can two people eat.
I am sure if Marry Berry and paul hollywood see my creation they will be saying the biscuit is too thick, the chocolate cover doesn't have a smooth shiny finish etc.... because that is what they told some of the contestant.
They both really look to each and every detail.
So when I finished making them Hans came in to the kitchen and said you know this one is a bit too thick, the chocolate is no shiny, it is having some bubles etc :-)


.


Monday, 29 October 2012

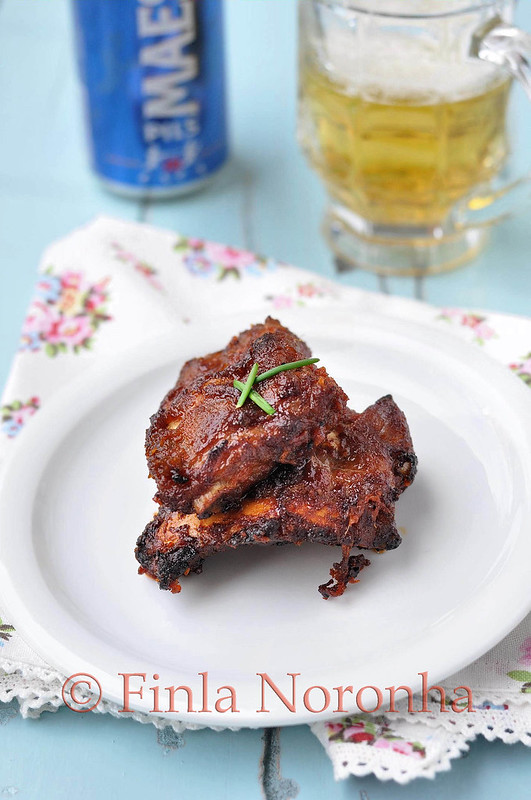
Anyone for Delicious Ribbs

I have a feeling that this week I will be posting often delicious posts.
The reason for that, is Hans left to Delhi on friday for few concerts, so as always when he is not home I have too much free time.
Ofcourse if my sister in India read this post she will say in her mind you always have too much free time even if Hans is home :-)

Weekend was good as Shyama had come home on friday so then I do things with her meaning evening I do something special on friday as the weekkend is starting.
And one plus point of having a daughter who is 20 years is you can open up a bottle of wine and enjoy a cosy evening with her.
I would have rather that we had these delicious ribbs with the wine but alas this is something I made a while ago.
So I bought some bite size pizzas from the freezer section , opend up the red wine and when she was home in the evening we had a cozy evening with just two of us.
But then Shyama left back to her place yesterday evening so here I am sitting and writting a post.

If you are a regular reader of my blog you will know I have mentioned a foodie group in Facebook which I am also a memeber.
I love that group, we discuss recipes, ingridients, tell each other what we had for lunch or dinner, drool on pictures what the other's are making and wishing there was a way that we could grab these delicious food we see from our screen.
All in all it is such a nice group that I love beeing in the group.
So one of the memebers ( Kaajal) posted a pic of the ribbs she made I was like wow it looks so yummy that I want to make them too. So she posted the recipe there and I made them here at home and we loved it, actually I must say I have never ever ate such a tender ribbs, I think it must have been the grated apple etc in the marinade.
If you want to try the delicious recipe then you can find the recipe here


Saturday, 27 October 2012

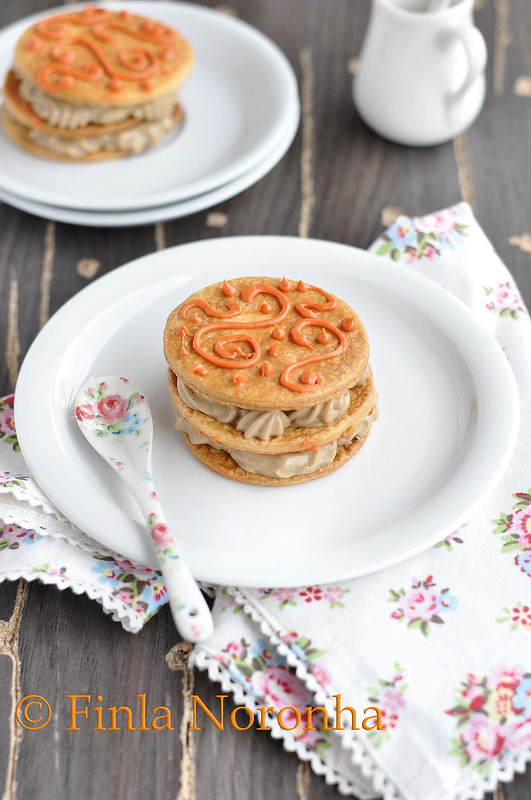
Mille-feuille/Napoleon - Custard Slice

Something I have always wanted to make was Mille - feuille slices, but like lot of bakes I want to do just sits there in my mind wanting me to make them, but lazy etc...
So when I saw this month Daring bakers challengs I was really excited as I have not been doing the last two challenge and I didn't want to miss it again.
But days passed by and I was like Ok, I will miss this one too because of my same excuses of beeing lazy, nobody to eat and even if I make them it is difficult to transfer them to my inlaws place to share with them etc...
But as you can see I did make them and we here at home loved it.
I am used to make the puff pastry ( only when I made some sweet bread but then tha tis with yeast) but the technic stays almost the same so I knew that I woulb be able to handle it.
I didn't want to make rectangle ones as If i make long ones I know when I slice them I will make them look messy that says a lot about my knife skills.
So I cut the pastry into small circles and baked them.
As one don't want the puff pastry to rise as always one puts a heavy metal tray on top, but I forgot to remove them after a while and only thought aobut it it the last moment so as you can see mine didn't rise at all .
Another changeI did was I used Michel Roux Cream pattiserie recipe as that is the one I mostly make and I thought I will stick to the same recipe.
I also didn't want the traditional sugar icing on top, so I melted a bit of white chocolate, added some color and tried to give it a India look :-)

October 2012 Daring Bakers’ challenge was hosted by Suz of Serenely Full. Suz challenged us to not only tackle buttery and flaky puff pastry, but then take it step further and create a sinfully delicious Mille Feuille dessert with it!

Pâte feuilletée /Puff Pastry

Servings: Makes 8-10 mille-feuille (yields: 675g pastry)

Ingredients
 1¾ cup (250g) plain/all-purpose flour
 Scant ¼ cup (55 ml) (1¾ oz)(50g) unsalted butter, chilled and cubed
 1 teaspoon (5ml) (6 gm) salt
 ½ cup plus 2 tablespoons (5/8 cup)(150 ml) cold water

14 tablespoons (210 ml) (7 oz) (200g) butter (for the beurrage), room temperature
 3½ tablespoons (55ml) (30g) plain flour (for the beurrage)

Additional flour for rolling/turning

Directions:

1. Cut the larger quantity of butter into smallish pieces and set aside at room temperature.
 2. Put the larger quantity of flour into a bowl with the salt and the cold, cubed butter.
 3. Lightly rub the butter and flour between your fingertips until it forms a mealy breadcrumb texture.
4. Add the cold water and bring together with a fork or spoon until the mixture starts to cohere and come away from the sides of the bowl.
 5. As the dough begins to come together, you can use your hands to start kneading and incorporating all the remaining loose bits. If the dough’s a little dry, you can add a touch more water.
 6. Knead for three minutes on a floured surface until the dough is smooth.
 7. Wrap in clingfilm and refrigerate for at least 30 minutes.
8. While the dough is chilling, take your room temperature butter and mix with the smaller amount of plain flour until it forms a paste.
 9. Place the butter paste between two sheets of clingfilm, and either with a rolling pin or your hands (I found hands easiest) shape it into a 4.5”/12cm square. You can use a ruler (or similar) to neaten the edges.
10. Refrigerate for about 10-15 minutes so the butter firms up slightly. If it’s still soft, leave it a bit longer. If it’s too hard and inflexible, leave it out to soften a touch. You want it to be solid but still malleable.
 11. Once the dough has chilled, roll it out on a floured surface into a 6”/15cm square. Place the square of butter in the middle, with each corner touching the centre of the square’s sides (see photo below).
 12. Fold each corner of dough over the butter so they meet the centre (you might have to stretch them a little) and it resembles an envelope, and seal up the edges with your fingers. You’ll be left with a little square parcel.
13. Turn the dough parcel over and tap the length of it with your rolling pan to flatten it slightly.
 14. Keeping the work surface well floured, roll the dough carefully into a rectangle ¼ inch /6 mm in thickness.
 15. With the longest side facing you, fold one third (on the right) inwards, so it’s covering the middle section, and ensure that it is lined up
16. Then, fold the remaining flap of dough (on the left) inwards, so you’re left with a narrow three-layered strip17. Repeat steps 14, 15, 16.
 18. Wrap up in clingfilm and chill for at least 30 minutes.
 19. Repeat steps 14, 15, 16 twice.
 20. Wrap up in clingfilm and chill again for at least 30 minutes.
 21. Repeat steps 14, 15, 16 two final times.
 22. Wrap up in clingfilm and refrigerate until needed. The dough keeps a couple of days in the fridge.

Mille-Feuille/ Napoleon/ Custard Slice

Servings: Makes 8- 10

Ingredients
 1 x batch pâte feuilletée/puff pastry (see above)
 1 x batch crème pâtissière/pastry cream (see above)

2 ¾ cups (660 ml) (12⅓oz) (350gm) icing sugar
 2 teaspoons (10 ml) lemon juice
 2 large egg whites
 ½ cup (2¾ oz) (80gm) dark chocolate

Directions:

1. Preheat oven to moderately hot 200 °C /400°F/gas mark 6.
 2. Lightly dust your work space with flour and remove your dough from the fridge.
 3. Roll into a large rectangle, the thickness of cardboard. The recipe I followed specified no other dimensions, but I rolled mine to about 12”/30cm x 18”/46cm.

(I found it easiest to start the rolling on the work surface, and finish it off on a large piece of greaseproof paper. That way it’s easier to move the sheets of pastry around.)

4. Cut into three equal pieces and place on a baking tray. If you don’t have space for all three, you can bake them separately.
5. Prick the pastry sheets all over with a fork.
 6. Place another sheet of greaseproof paper over the top and then a heavy baking tray. This will prevent the layers from puffing up too much.

(N.B. I found my baking trays weren’t heavy enough, so also used a pyrex dish to add more weight. Just ensure that the pastry sheets are evenly weighted down.)
7. Bake each sheet for about 25 minutes in a moderately hot oven 200 °C /400°F/gas mark 6, removing the top layer of greaseproof paper/tray 10 minutes before the end for the tops to brown. Keep an eye on them and lower the temperature if you think they’re browning too much.
 8. Remove the baked sheets from the oven and leave on a wire rack to cool.
9. Once the pastry has cooled, you’re ready to assemble your mille-feuille. Get a sturdy flat board, your pastry and the chilled crème pâtissière from the fridge.
 10. Lay one sheet on the board and spread half the crème patisserie evenly over the top.
 11. Take the second sheet and place it on top, pressing down lightly with your hands to ensure that it sticks to the filling.
 12. Spread the remaining crème pâtissière and place the last sheet of pastry on top, pressing down again. (Don’t worry if there’s some oozing at the sides. That can be neatened later.)
13. Pop in the fridge while you prepare the icing / chocolate.
 14. Melt the chocolate in a bain marie, stirring periodically. Once melted, transfer to a piping bag (or plastic bag with end snipped), resting nozzle side down in a glass or other tall container.
15. To make the icing, whisk 2 egg whites with 2 teaspoons lemon juice until lightly frothy.
 16. Whisk in about (2 cups) 300gm of the icing sugar on a low setting until smooth and combined. The mixture should be thick enough to leave trails on the surface. If it’s too thin, whisk in a bit more icing sugar

.19. STILL working quickly (phew), take a sharp knife and lightly draw it down (from top to bottom) through the rows of chocolate. A centimeter (½ inch) or so further across, draw the knife up the way this time, from bottom to top. Move along, draw it down again. Then up. And so on, moving along the rows of chocolate until the top is covered in a pretty swirly pattern.

 

Tuesday, 23 October 2012

Cup Cakes Filled With Jam

I am sure everybody knows that October is known as Pink October and it is National Breast Cancer Awarness Month.


Breast Cancer Awareness Month (BCAM), also referred to in America as National Breast Cancer Awareness Mont (NBCAM), is an annual international health campaign organized by major breast cancer charities every October to increase awareness of the disease and to raise funds for research into its cause, prevention, diagnosis, treatment and cure. The campaign also offers information and support to those affected by breast cancer.
As well as providing a platform for breast cancer charities to raise awareness of their work and of the disease, BCAM is also a prime opportunity to remind women to be breast aware for earlier detection.
And in facebook I am in a wonderful food group called Chef at Large and I must admit I love the group and indeed it is a very busy group.
And there is always some event going on there which I try to participate and this week it is Breast Cancer Awarness Day.
So I joined in.
Actually in my mind I had planned to make Macaons. But then cancelled that idea and thought of making these. I am happy i changed my mind as I loved eating them and loved looking at them too.


130 gm soft butter
130 gm sugar ( I used 80 gm)
130 gm flour
1 tsp baking powder
2 eggs
1 tsp Vanilla essence
1 to 2 tbsp of milk
Any kind of jam, ( I used mixed fruit jam) I didn't measure I just took few tbsp of the jam
Marzipan for decoration ( I used white marzipan and just added pink color)

Preaheat the oven to 180° c.
Beat the butter and sugar in a bowl till they are fluffy.
Add the egg one by one, mixing well after adding each of them.
Add the vanilla essence.
Sieve in the flour and the baking powder to the bowl and fold it carfully and if the bater is thick add the milk, I only had to use 1 tbsp of milk.
Fill each cupcake liner with the mix and bake for 6 to 18 minutes or untill they are done. When you insert a kinfe it should come out clean then youknow it is baked.
Cool in a rack for a while.
In the mean tim heat the jam in the MW don't over heat it, pour the jam into the pipping bag with the nozzel and then you inject the jam into the cupcakes.
I injected in three different places in each cup cake. Next time I think i will use a thicker nozzel.


Decorate as seen in the picture or according to your liking
.


Sunday, 21 October 2012

Fried Eggs on Potato Chips

I think it is getting a habbit I post on Sunday's ( to the habbit I never keep busy with my blog on sunday)
Ok reason for that is, I have been having head ache, for the last three days, and I think in the last days I have taken so many painkillers,
I went for a concert yesterday from Hans and Shyama and even before going for that I gulped down a painkiller.
So today's plan was Shyama had to attend a lecture we thought we will driver her there ( as it is in Brussels, so that she don't have to take the train , metro etc..) and Hans and Shyama will attend the lecture and I will go to a good happening which is going on near by.
But then today morning I decided after all the headaches and taking all the pills , the last thing I wanted to do was sit in the car for a 100 km drive plus walk around there .
So I stayed home, with Hans saying take rest, lay down and don't do anything, just sleep and rest.

I don't know aobut you all I am one person hates just laying there or sitting doing nothing,.
I don't mind doing nothing, but then I sit in the sofa and watch TV and that is doing nothing for me :-)

So as you can see I am not resting, I am writting a blog post.
Good that Hans or Shyaùa don't bother about my blog otherwise they will say didn't we tell you to rest.

I remember seeing this Delicious Fried Eggs on Chips in Monica's place and bookmarking it.
I know if you like Indian cusine you will know her as she is a food writter and authour and I do have her book Modern Spice which I love.

Actually I made the a while ago when I was home alone and wanted to have something for dinner but not my normal sandwich etc.... i wanted to have something to indulge on and I thought why not make this and I must say I loved it.
I would have loved to have a but more runny egg, but I must have been busy doing something else as I over did my eggs, but that didn't matter anyway as i loved it.
You want to make this hop over to her place for the recipe.
It is so easy to make.
 

Tuesday, 16 October 2012

Twisted Bread With Brownie Filling / Strengelkoeken met brownievulling

For the last couple of years I have been joining in WBD and I remember thinking in the begning of september that hopefully zorra will do the WBD again this year, and when I saw her posting I was like yupieeee and soon click join the event in fb.
Can you imagine just getting excited aobut a Bread event.
The reason I get excited about World Bread Day 2012 - 7th edition! Bake loaf of bread on October 16 and blog about it!is because when she post the round up, it is fun to see all the breads people have made from around the world, some really particular to their country etc....
Some of the breads I have made before for the event are Celebration bread , Soft Buns with Seeds, chocolade koeken.

Now my bread is from a Dutch book Called Basic broodjes en koeken ( Basic bread and cookies they are not cookies but shaped small bread, but can't translate it )
Now you all will be thinking why she buys a basic bread book, but this is not simple basic book, it is about the brood and koeke they sell here in the bread shops, so ofcourse I want to learn how to make them :-)


I have made breads from the same author but from a different book ( it is a series of book the puplishing company has brought out and I buy each book they publish)
With the same Raised puff pastry I have made Chocolade Koeken


In the book it is written you can make 8 but I only got 6.


You need for
Twisted Bread with brownie filling / Strengelkoeken met brownievulling:

1 portion of Gresen bladerdeeg ( Raised puff pastry) recipe is here and there is step by step picture how to make it.
For the brownie filling.

75 gm butter
75 gm Dark chocolate
1 egg yolk
75 gm light brown sugar
50 gm hazelnut powder
40 gm flour
1 egg white
Few tbsp of cherry or apricot jam .
Melt the butter with the chocolate ( I did in the MW )
Beat the egg yolk with the sugar in a bowl and mix this mixture together with the melted butter and chocolate.
Add the hazelnut powder and flour and give it a good mix.
Beat the eggwhites into soft peak and fold into the mix. Keep this aside while you shape the bread.

Roll the grezen (raised puff pastry) after the last 35 minute of resting into a long square. It should be 1 cm thick.
Cut the long square into 1 cm broad long pieces.
Twist each pieces one by one like you see in the picture and form a circle with a opening in the middle ( refer the step by step pictures)
Put them on a baking tray with a baking paper.
Leave it covered for raising for 1 hour. ( I cover with platic butters foil)
After the one hour raise fill each circle with the brownie filling ( you will have brownie filling left, i keep in the frezzer for using it another time)
Preheat the oven to 220°c and bake for 15 minutes.
When they are baked, take them out from the oven, melt the jam and using a brush give each koeken a jam wash.

I did the above temperature, but my koeken got brown fast and it was done it 12 minutes, so next time I will bake them for 200°c.


Sunday, 14 October 2012

Fast Grilled Garlic Chicken


 Normally I don't post on weekends, but it was today elections here in Belgium and Hans is watching all the election news in TV ( not that he is intrested in polictics) but with all the government issues from the last election he just want to know who is leading.
I on the other hand don't bother about all this as I am like nothing will change who ever  wins, so I thought whynot write a post for my blog :-)
This is what I made for lunch yesterday.

These days we have Friets (french fries) on saturday as Shyama come home friday evening and she loved friets and thatis something she never makes in her place.
So saturday it is our friet day, so for yesterday I made this grilled chicken , friets and served with a salade and ofcourse with the home made Mayonaisse.
The original recipe is from this months Delicious magazine, and recipe is from Donna Hay.
Of course I gave myown twist like adding parsley and adding a bit more butter ect.
I have noted what I did extra.


 60 gm buter softened ( used 80 gm)
4 garlic cloves crushed
Handfull of fresh parsley chopped - this was not in the recipe but i did)
Salt and pepper powder to taste
I whole chicken ( 1 1/2 kg )
8 large fresh rosemary sprigs
Few springs of parsley.
olive oil for drizzling
Additional pepper powder and salt for sprinkling on top
Preheat the oven to 200° c / fan 180°c / gas 6.
Put the butter garlic ,salt ,parsley and pepper in a small bowl and mix to combine.

Using the kitchen sissors, cut along both the sides of the chicken's back bone to remove it. ( Ok I cut on one side only as i didn't want to remove the backbone fully as here hubby loves the neck part etc...)
Open out the bird and press firmly on the breastbon to flatten.
Gentley loosen the skin from the flesh using your fingers and push the garlic butter under. I did this for the breast part and also on the legs and thighs.

Put the rosemary and parsley in a baking dish lines with baking paper and top with the chicken. Sprinkle with pepper powder and salt on to the kitchen.
Drizzle with olive oil.
Roast for 40 minutes or untill the chicken is cooked trhough. ( I did for 50 minutes)
Cut into quarters and serve with a simple salade and friets.
There was lots of delicious melted butter in the pan and I drizeled this over the chicken pieces before serving.


Thursday, 11 October 2012

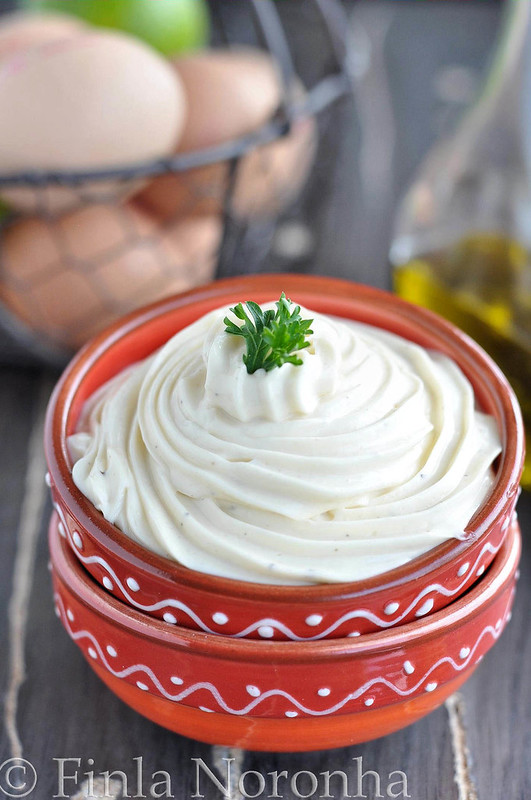
Mayonnaise In Less Than Five Minutes

I don't know about you all, I myself didn't know about Mayonnaise untill I came to belgium some 22 years ago.
I am sure this generation of Indian kids would be like What??? she didn't know mayo, yeah that is true, any way I come from Cochin ( Kerala) and this was the time actually there was not even bottled water Bisleri or even Coca Cola, I think Bisleri and Cola only started comming from 91/92 (not sure i just think)
I remember in the late 80's when Hans came to visit me and he didn't want to drink the tap water as he always got sick so he used to bring these purifying tablets so I am for sure Bisleri was not available :-)
So you can imagine Mayonaise, so when I came here and had Mayonnaise (Home Made) in my Mother in  laws place I was hooked.
How woudn't you be hooked as we alwasy ate them every week with one of the traditionall food in Belgium friets.
MIL always maker her own mayo as she says that is much better in taste and I do agree.
She used to make the old way, just with the yolk, adding peper, salt, etc..... and then using the mixer or the whisk and adding oil little by little, this is how she made.
And then once she saw one of the Flemish TV chef making mayo in minutes.
So you can imagine her delight and then the talk how this chef was making mayo in a easy way and just in few minutes, from that time onwards she only makes mayonaise like this and I have learned it from her and I too only make mayonaise like this easy method.
This is the basci mayo recipe and I make veriety of mayonaise which I think I will post one by one.
Ans if I may say I atleast make mayo every 10 days .

I am surprised that I have not posted how to make easy mayonaise here before.
It is like one never post simple and easy things.

Tip:
Make sure your eggs are super fresh , and oil and eggs are in room temperature.
Sometimes I put more lime juice or less, make sure you taste the mayo for salt and sourness etc... as the amount of lime juice you add depend on the lime you have.
Make sure you use a powerfull hand held blender like you see in the picture.
This will keep in the fridge for a week. But make sure you close with a lid and also each time you take it our from the fridge for using it that you give it a good stir.
Don't forget Mayonnaise will get a bit more thick while sitting in the fridge.
But have to say, Mayonaise don't that last long in our home as once a week we make firets and also we use it for when we have salades and also for chicken paste, ham paste etc..
Also as mayonaise is used making raw eggs, they do say don't serve them for small kids and old people.
When ever I went back home I made mayo at home but every time Hans and Shyama will say it doesn't taste same as the one here I make for them, I think it could be also they are used to theoil I use here.
In the picture of the ingridients I have used my olive oil bottle, but don't use olive oil, use sunglower oil or some oil which doesn't have any prominent flavour.


Home Made Mayonaise:

1 large fresh egg
Oil 200 to 250 ml ( I always use sunflower oil)
2 tablespoon lime juice ( I use lime, but if you want to use lemon you can) there are time when i use less or more lime)
1 heap tsp mustard paste ( Some ppl don't like adding mustard in mayo so if you are one of them then leave it out)
Pepper and salt to taste.

I use a long measuring jar to make mayonaise.
Add all the ingridients into the jar, take you hand blender and mix it for few minutes.
You will notice that it is getting creamy texture very fast.
Do taste if you want add more salt and peper and lime juice.
If you think it is too runny add more oil and give it a mix.


Monday, 8 October 2012

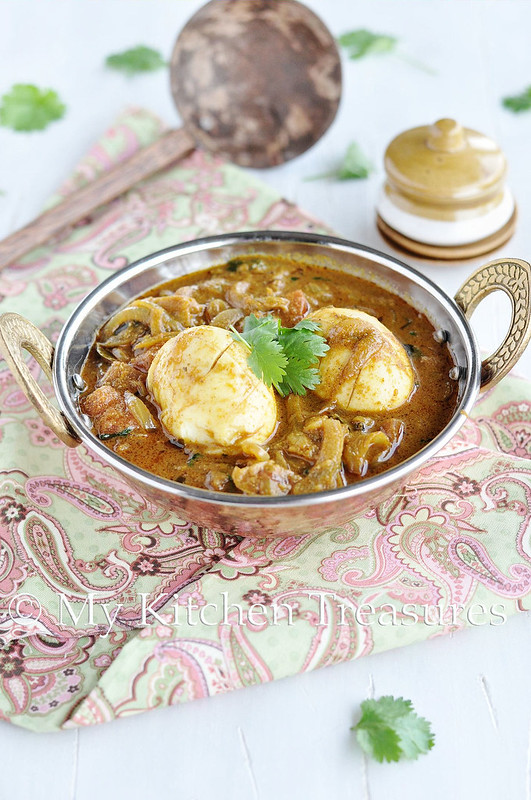
Egg Masala

I love egg curry and Shyama loves it too, but Hans don't love the egg curies as much as us, so I tend to make them when he is out of the country :-) and this I made couple of months ago while he was in Austria,
 I think when I am alone at home for few days, I have noticed my food bill is low ( OK but the other bills are high , like when I am alone I go for prop shoping or some other shopping) but the food bill is really low, simply because I tend to make all the dishes I miss eating and they don't need any thing expesive, like this egg curry, I will have everything at home and even if I don't have eggs I just have to out to the local shop and buy them.

I remember when ever there was not that much veggies letf in the fridge, mom always made something with eggs, or just say when there was unexpected guests comming home, what did mom do make super fast egg curry.

I love making this egg curry, I know the recipe is from a blog which I have written down in my hand written cook book years ago, just that I don't know from which blog it is.

Egg Curry:
Boiled eggs 2 ( peel them and I give it few slashes so that the masala and go inside)
2 red onions slices ( if you want you can use 1 but I love onions)
Ginger paste 1 tsp
Garlic Paste 1 sp
1 tomato slices
Chilli powder 1 tsp
Corriander powder 1 tbsp
Curry leaves few
Gaaram msala powder 2 tsp
Few  tbsp oil
Salt to taste
1 cup of water
Heat oil in a pan add the onions, curry leaves and saute for few minutes. After that add ginger , garlic paste fry for few minutes or till the onions are brown.
Add the chilli powder, corriander powder, garam masala for few minutes.
Then add the tomatoes fry well atleast 5 minutes the sauce should look brown.
Add water boil for few minutes. And when everything is thick add the boiled eggs and remove from the heat and serve.


Wednesday, 3 October 2012

Sweet Chilli Dipping Sauce

I love swwet and sour dipping sauce and there is always a bottle which is bought from the Asian store in my home, but then mostly they are too sweet than hot to my taste.
So I was delighted when I saw int he Wagamama Ways with noodles book.
I do have to say this dipping sauce is really hot and i mean spicy hot, it could be also of the kind of chillies I used, but I am not complaining, I like it hot ;-)
So I guess the hotness will depend on the chillies you use.


In the book the picture is more like a syrup, but my end result is thicker, could be also I used my hand blender, I blend it twice, once after 2 minutes and then after the full cooking was done, but next time I will use my blender or my mixer which i used for making Indiancoconut chutney's etc...so that it will be more smoother.
I made the sauce for half of the ingrrdients as I only had so much chillies here at home.


250 gm red chillies trimmed ( I used those small red thai chillies)
3 garlic cloves peeled and roughly chopped
100 gm light brown sugar
2 tsp whit wine vinegar

Compbine everything in a small pan with 100 ml water, brung to the boil and simmer over a moderate heat until soft, about 5 munites.
Blitz in a blender and season with a scant teaspoon of salt.
Return to the pan and siller for futher 10 minutes, taking care not to let it catch on the bottom.
Allow to cool and refrigerate.